


Create A Twitch Account
The first step in your journey to going live on Twitch is to set up an account. You won’t be able to access the platform’s features without one.
How to Create a Twitch Account for Live Streaming
Twitch provides an easy-to-follow guide on creating an account on their platform. The process ultimately boils down to 3 steps:
- Read the Community Guidelines
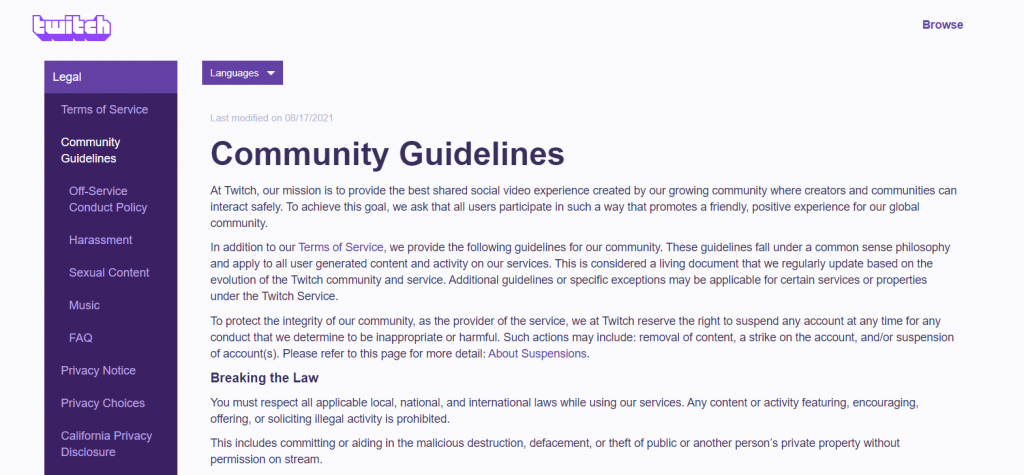
 It’s important to know what Twitch’s community guidelines are before creating an account. By being aware of the behaviors that constitute violations, you’ll be better positioned to avoid receiving penalties and keep your stream running.
 - Sign up on Desktop or Mobile
Twitch allows you to easily create an account on both desktop and mobile. Just head over to their website on desktop or search for Twitch on your mobile app store. Click the “sign up” button and follow their directions. - Enable Two-Factor Authentication
Once you’ve set up an account, you’ll need to enable 2FA in order to start streaming. Make sure you have your phone handy!Why? Even though it feels like a pain, we promise it’s worth it. This is an added layer of security for you, and prevents your stream and information from getting hijacked.
 It’s important to know what Twitch’s community guidelines are before creating an account. By being aware of the behaviors that constitute violations, you’ll be better positioned to avoid receiving penalties and keep your stream running.
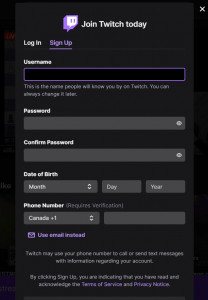
How To Stream on Twitch: Picking Your Software
Now that your account is set up and you’re anxious to dive into a game, it’s time to decide what twitch streaming software to use to encode your stream. What does this mean? Super simply, encoders make a digital copy of your inputs that can be streamed on the internet.
Although hardware encoders are available, we almost always recommend software encoders when you’re starting your streaming journey (they’re significantly more budget and beginner-friendly). That said, you do require a certain amount of computing power for most of these options – the better your laptop or computer, the better the results! (Don’t worry, we’ll suggest some minimum specs for you below!)
There’s a myriad of options available when it comes to software encoders. To help get you started, here’s a list of the most popular choices on the market:
- Open Broadcaster Software (OBS)Simply put, OBS is the OG. OBS is a free software encoder available on Windows, Mac, and Linux that is ideal for multi-platform streaming, and it revolutionized streaming as we know it. Nothing handles PC game capture better.
Although the interface isn’t as user-friendly as others, many beginners still choose this software because of its popularity and history. Every streamer knows, loves, (and sometimes curses) OBS, and Lightstream even has one of the founding creators on our team!
All of us streamers owe OBS a giant “THANK YOU” for the hard work they did to create this, but a few competitors have since come around to tweak the program and make it more digestible and feature-rich.
- A simple, cloud-based broadcaster jam-packed with features that removes the need for a high-end computer or a specific operating system. We’re loved by gamers and talk show hosts alike for our ability to create unique, custom layouts in seconds. Plus, we’re platform-agnostic—from Windows to Mac & Chrome to Firefox, you’ll get fantastic quality with Lightstream. Streaming a podcast or talk show? You can use Studio 2 to make things even simpler!
We even have Rainmaker to help you with alerts and finding the best games to broadcast!
StreamLabs Desktop
Formerly known as StreamLabs OBS, this custom version of OBS links up directly with StreamLabs and is great for creating custom layouts to easily manage your streams. Unfortunately, StreamLabs Desktop is only available for Windows.XSplit
With an intuitive and user-friendly interface, many find that XSplit is one of the easier software applications to use. However, note that this software is also only available for Windows.
 Simply put, OBS is the OG. OBS is a free software encoder available on Windows, Mac, and Linux that is ideal for multi-platform streaming, and it revolutionized streaming as we know it. Nothing handles PC game capture better.
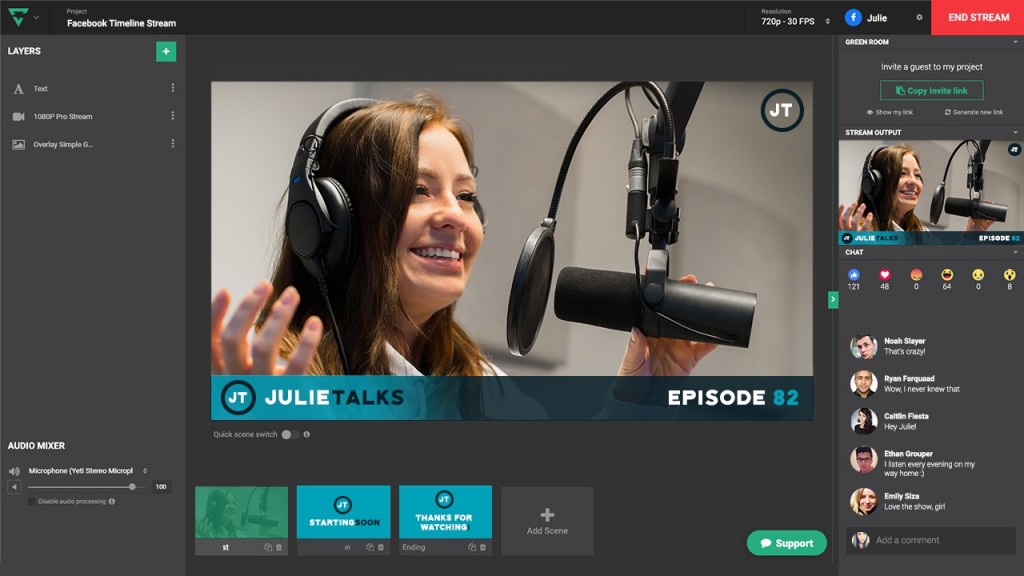 A simple, cloud-based broadcaster jam-packed with features that removes the need for a high-end computer or a specific operating system. We’re loved by gamers and talk show hosts alike for our ability to create unique, custom layouts in seconds. Plus, we’re platform-agnostic—from Windows to Mac & Chrome to Firefox, you’ll get fantastic quality with Lightstream. Streaming a podcast or talk show? You can use
 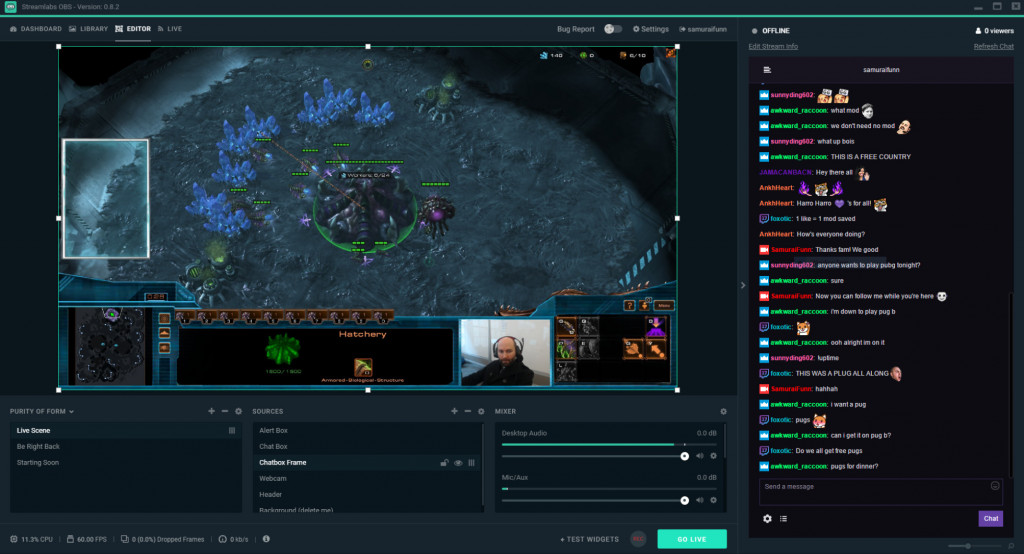 Formerly known as StreamLabs OBS, this custom version of OBS links up directly with StreamLabs and is great for creating custom layouts to easily manage your streams. Unfortunately, StreamLabs Desktop is only available for Windows.
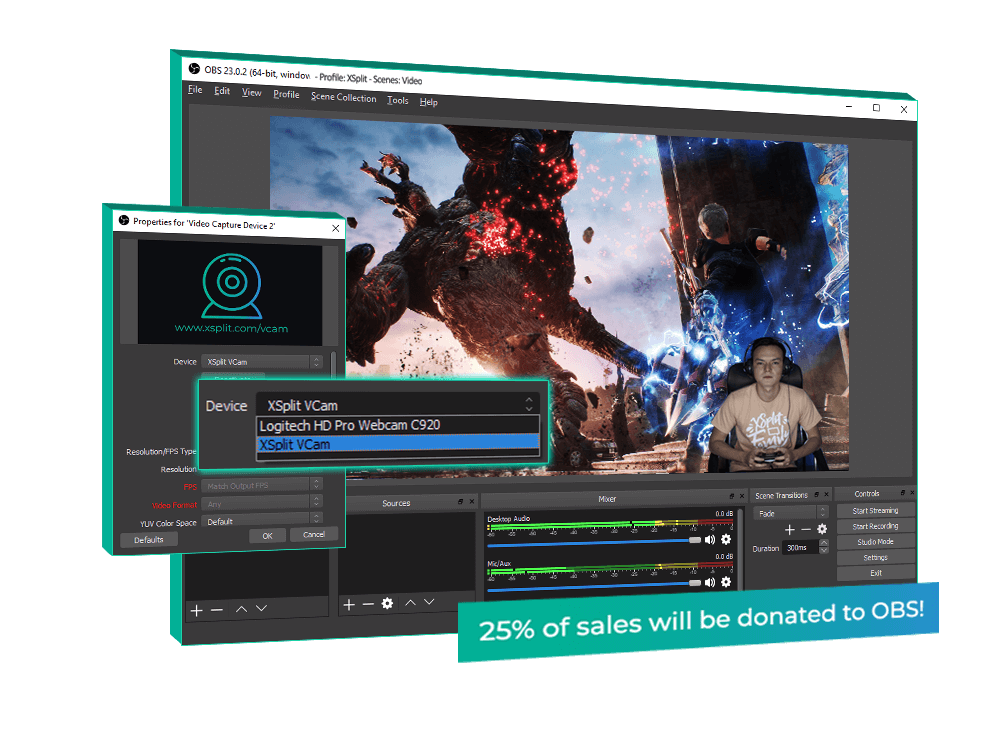 With an intuitive and user-friendly interface, many find that XSplit is one of the easier software applications to use. However, note that this software is also only available for Windows.
What Type of Hardware to Use When Broadcasting
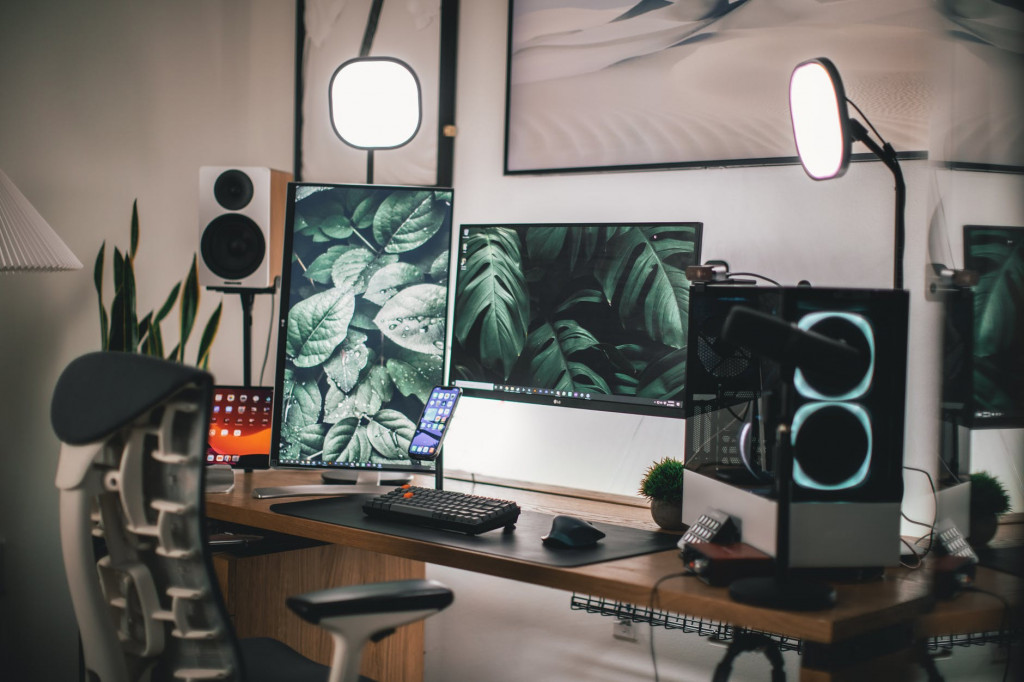
Hardware is a big part of how to stream on Twitch. Many popular streamers on YouTube and Twitch use the highest-end equipment on the market, but there are plenty of simple, cost-effective options available.
Here’s a list of things to consider when looking for hardware for your Twitch streaming setup:
- Computer or ConsoleWe’ll show you how to stream from both options below. The most important components are your processor and graphics card, which both console and PC have. There are benefits to both options, so don’t feel trapped if you can’t get a gaming PC yet!
- MicrophoneGood microphones can work wonders for your Twitch streaming setup. A clear, smooth voice is one of the most important parts of keeping viewers engaged and interested in your content. Although the built-in microphone that comes with most laptops and headphones is technically enough to get you started, we recommend picking up a standalone microphone as soon as you can.
- Webcam
 We’ll show you how to stream from both options below. The most important components are your processor and graphics card, which both console and PC have. There are benefits to both options, so don’t feel trapped if you can’t get a gaming PC yet!
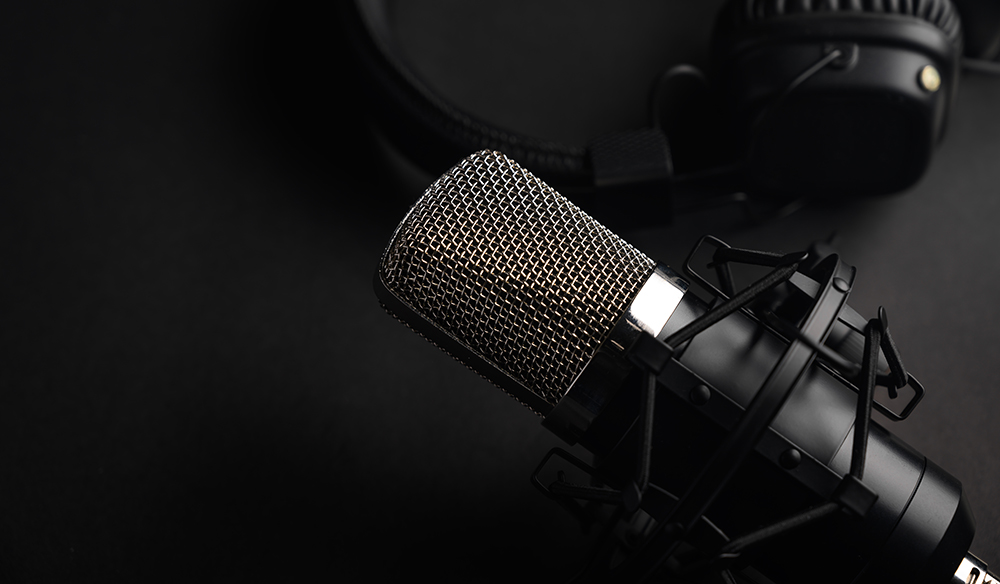 Good microphones can work wonders for your Twitch streaming setup. A clear, smooth voice is one of the most important parts of keeping viewers engaged and interested in your content. Although the built-in microphone that comes with most laptops and headphones is technically enough to get you started, we recommend picking up a standalone microphone as soon as you can.
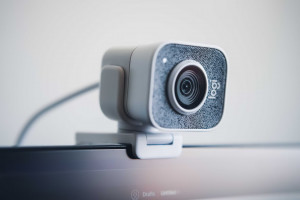 Dedicated webcams are another great way of adding more dimension and personality to your streams. That said, even top-quality cameras are of little use without good lighting to accompany the footage, so try lighting your scene first, before making the decision to upgrade. Looking for suggestions? We made a video about it!
You might also consider buying yourself a green screen, a stream deck, and/or a hardware encoder. These aren’t necessary for you to stream, but they can definitely help take your production to the next level.
As many popular games are exclusive to certain platforms, it’s no wonder cross-platform gaming and streaming is a huge part of the Twitch community. Here’s how to stream on Twitch with the most popular devices:
How to stream to Twitch from a PS4
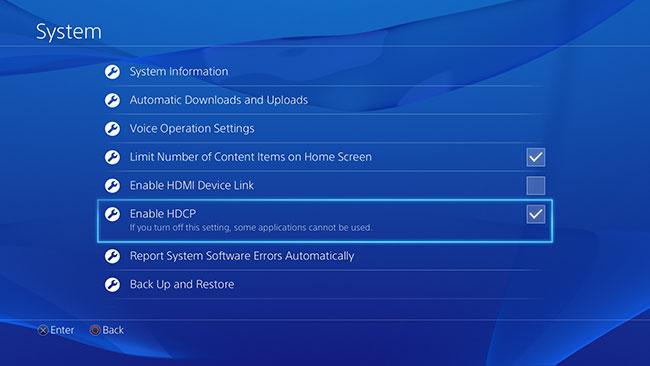
- Disable HDCP and other settingsSince Twitch comes built-in to the PS4, all you need to do is change a few settings to get stream-ready. In particular:
- Disable HDCP by going to Settings > System
- Under Settings > Devices, adjust audio levels and your PlayStation Camera
- Enable your audio in-game through Sharing and Broadcast > Broadcast Settings > Advanced Settings > Audio Sharing Settings
- Turn on “Display Messages to Spectators and Spectators’ Comments” in-game under Sharing and Broadcast > Broadcast Settings > Advanced Settings
- Send PS4 Outputs to Lightstream
If you’re using Lightstream, setting up console streaming on PS4 is a breeze. Log in to Lightstream Studio with your Twitch account, select the Gamer plan, and adjust your project settings. Then:- Under Settings > Network > Set Up Internet Connection, select Custom, Automatic, Do Not Specify, and Manual
- Enter the following IP: 13.89.104.171 (or 52.143.11.150 for European users), and click ‘Do Not Use’
- Hook up your PS4 and Twitch accountsAfter you’ve adjusted the above settings, streaming on a PS4 is incredibly easy. Just open your game, tap your controller’s share button, and connect your account. To do so, just scan the QR code that pops up on the screen. You can also head to twitch.tv/activate if your smartphone isn’t QR-friendly.
- Start streaming!
You’re good to go! Title the broadcast and your stream is all yours. Have fun!
 Since Twitch comes built-in to the PS4, all you need to do is change a few settings to get stream-ready. In particular:
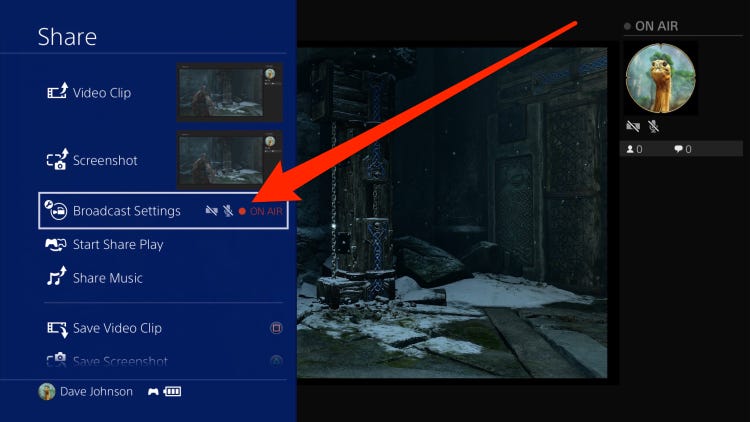 After you’ve adjusted the above settings, streaming on a PS4 is incredibly easy. Just open your game, tap your controller’s share button, and connect your account. To do so, just scan the QR code that pops up on the screen. You can also head to twitch.tv/activate if your smartphone isn’t QR-friendly.
How to stream to Twitch from an XBOX
- Install the Twitch AppTwitch is available for download on the Microsoft Store. Simply open the Store, search for ‘Twitch’, and install the app.
- Link your Xbox app to your Twitch Account
If you want to sync your Xbox streams to your Twitch account, you’ll need to link it to your app. Head over to twitch.tv/activate on a phone, tablet, or desktop computer, and enter the code displayed on your console to do so. Send Xbox Outputs to Lightstream
If you’re using Lightstream, getting your console to stream from Xbox to Lightstream is simple. Just log in to Lightstream Studio with your Twitch account, select the Gamer plan, and adjust your project settings as desired. Then:Open the Twitch app on your Xbox
Head over to the ‘Broadcast’ tab
Set ‘Lightstream’ as the destination
- Connect your camera & microphone
Good peripherals like cameras & microphones are essential to a high quality stream. Connect your devices to the back of your Xbox and adjust the following settings at Settings > Account > Privacy & Safety > Xbox Live Privacy > Customize:- Adjust the ‘You Can Broadcast Gameplay’ setting so that it’s allowed
- Make sure ‘You can share content made using Kinect or another camera’ is also allowed
- Under Online Status & History > Others Can See If You’re Online, select ‘Everybody’
- Title your broadcast & start playing!Click Start Broadcast. Twitch is usually able to automatically detect when you’re playing. You can also manually create a title – after you do, it’ll start broadcasting.
 Twitch is available for download on the Microsoft Store. Simply open the Store, search for ‘Twitch’, and install the app.
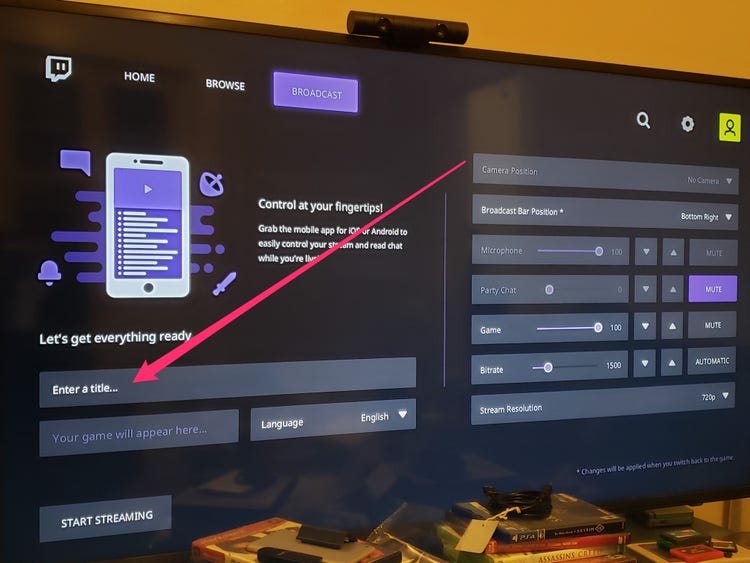 Click Start Broadcast. Twitch is usually able to automatically detect when you’re playing. You can also manually create a title – after you do, it’ll start broadcasting.
How to stream to Twitch from a Desktop Computer
Streaming from your desktop depends on your installed software platform. That said, steps will be similar regardless of whether you’re using OBS, Lightstream, XSplit, or something else.
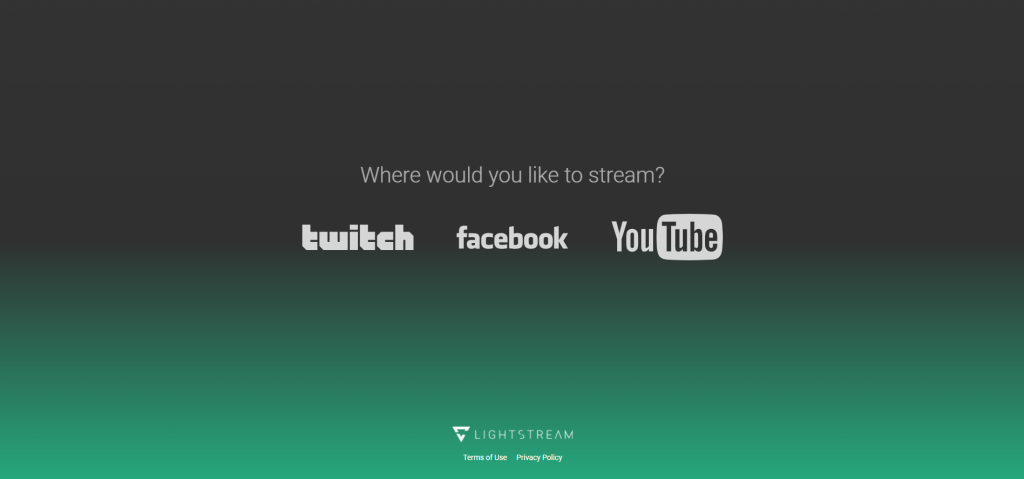
- Install your chosen software (& make an account if necessary)Though Lightstream works best with console streaming, you can (in some cases) also use it to stream high-quality footage straight from your desktop.
That said, we built Lightstream specifically to solve streaming from consoles. If you’d prefer to use something else for desktop streaming, OBS Studio, StreamLabs Desktop, or XSplit are all great options. Adjust your project settings as dictated by the platform, add your media sources (audio, video, and so on), & move on to the next step.
- Connect your microphone & camera
Make sure your microphone, camera, and any tertiary peripherals are connected to your computer. - Start streaming!
You’re good to go! It’s time to get started on your streaming journey.
 Though
How to stream to Twitch from Smartphones
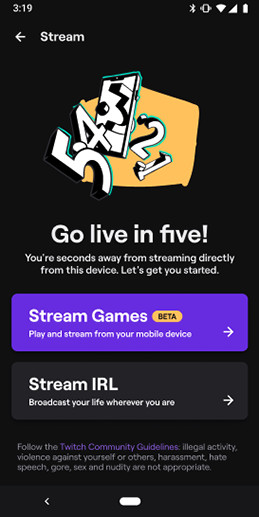
1. Install the Twitch App
Head over to either the App Store or Play Store and download the Twitch app for your respective device.
2. Log in to the Twitch website
Twitch will ask for your phone number or, using 2FA (two factor authentication), will send you a text message. Take that code and use it to confirm your log-in.
 3. Click the ‘Go Live’ button
Head on over to the top right-hand corner and click your profile image. It’ll take you to a page with a big ‘Go Live’ button. Click that, give access to your microphone and camera, and you’re all set!
4. Title your broadcast & start playing!
Like on other devices, all you need to do is title your stream. On desktop, you can also select a content category and a specific camera – after that, just click ‘start stream’ to get going.