The standard look for game streams is pretty generic, you have a webcam pointed at the face overlayed on top of gameplay…all by your lonesome self, talking to a faceless chat audience. But it doesn’t have to be that way, as you can make it a party by chatting on screen with a friend sharing both of your gameplay at the same time.

This article will go into detailed steps on how to set up a multiplayer stream to create exciting content that involves everyone.

Lightstream Studio and OBS


With a combination of using Lightstream Studio and OBS, you can create multi-view broadcasts such as this session from Twintriggers.

Multiplayer game stream to Twitch using Lightstream Studio


You can also broadcast with multiple camera angles for an in-person DND game like from Aminoquest, who fully replaced their OBS setup with Lightstream Studio.

Aminoquest, Lightstream Studio

Or go even further with 4 players and their game screens at the same time!

4 players and their game screens at the same time!


Using software like OBS alone is very dependent on both a single computer’s bandwidth and processing power, but with Lightstream Studio’s cloud-based streaming engine, you can stream multiple players and their cameras at the highest quality that everybody’s collective bandwidths can give.

Multiplayer Stream

To get started with a multi-gamer stream like Twintriggers, first, sign up to Lightstream Studio and enter a Creator project.

Creator project

Click Add a Layer and Select RTMP Source. In the RTMP Source side panel you can create multiple sources with their own stream key.

Select RTMP Source


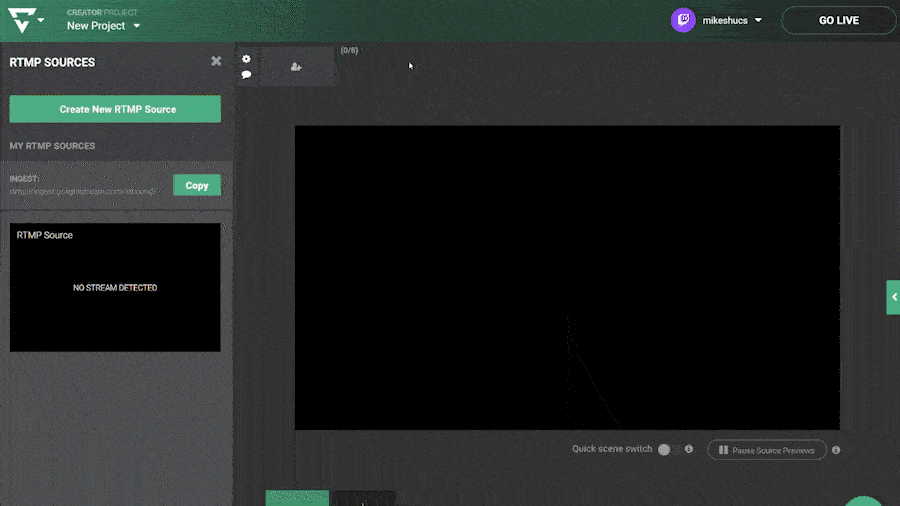
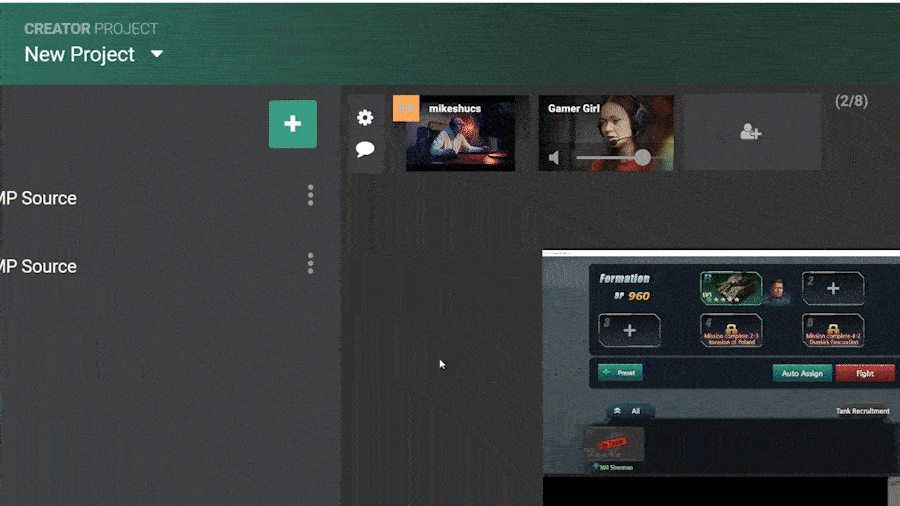
Click Create New RTMP Source to create a second source so we can have two game streams in our broadcast. 

Pro Tip

To avoid confusing the two sources, you can rename them so you know who goes where.

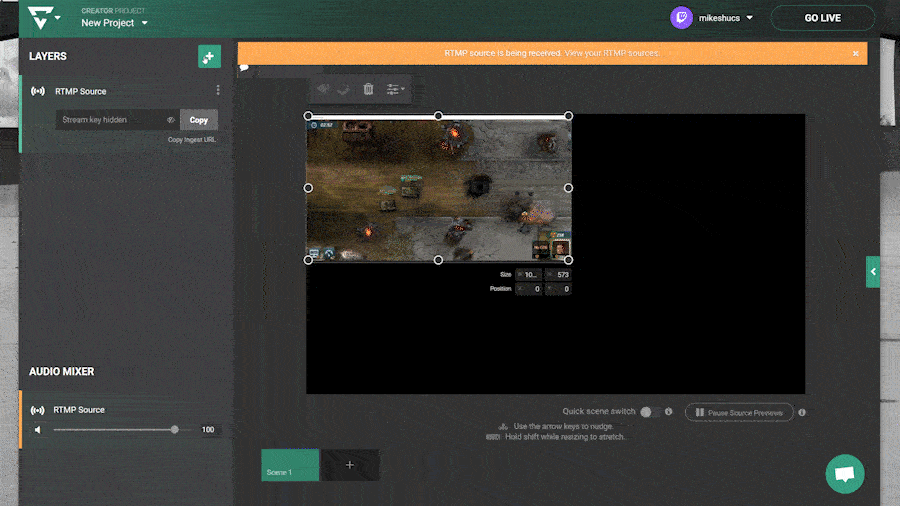
You can click the respective Copy buttons for both the ingest url and the stream key.

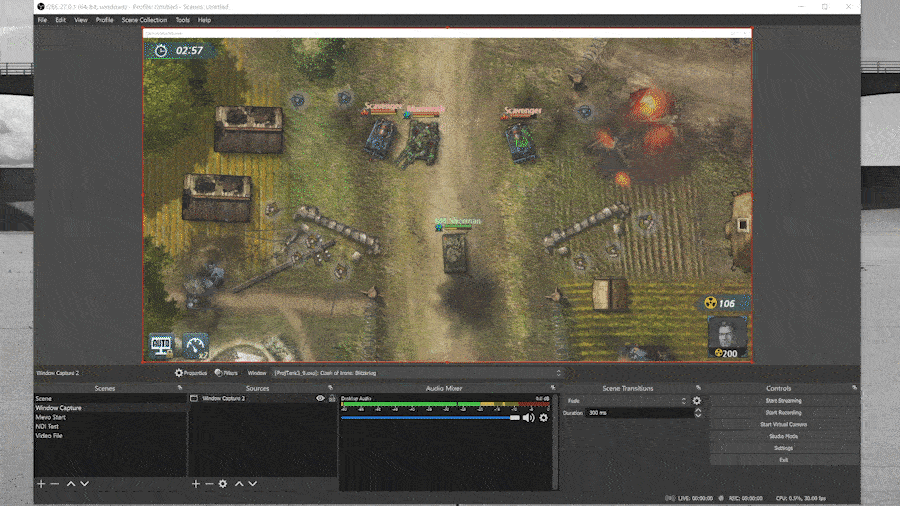
In OBS on each player’s computer, set up a scene with screen sharing on your game. In the settings, set up the Stream destination as Custom and paste the ingest url in the Server field and the player’s unique Stream Key into the Stream Key field.

Careful not to use the same stream key for both players!

Set up the Stream destination as Custom

Click Okay and then click Start Streaming to begin sending your game to Lightstream Studio.

In Lightstream Studio, the stream from each gamer will show up in their respective sources. Click on a source to add it to your scene, where you can resize and reposition.

Click on a source and you can resize and reposition.

Click on the Add a Layer button and RTMP Source to add the second player’s stream, and you’re now streaming both of your games!

RTMP Source to add the second player’s stream


But what about showing your beautiful faces?

Lightstream Studio features a powerful RTC (real time chat) engine for live video chat with remote guests. Simply share the unique link to all players and they will enter a Green Room where everybody can chat with each other no matter whether they are live or not.

Lightstream Studio features a powerful RTC


They will show up as sources that you can add into your scene and position wherever you wish.

Add layers to your heart's desire


Add graphics to taste and go live!

Add graphics to taste and go live!


That’s it!

You have created your first multi-gamer stream!

Spice it up with more overlays, backgrounds and even socially triggered overlays from Rainmaker and 3rd party integrations.

Follow the same steps to add even more players and their game screens, like how the Lightstream team features 4 players in their broadcasts. 

Learn more in part 2 of this tutorial on how to setup multiplayer streams!